Banana Syrup Recipe: Viscous Flavor
- Time: Active 5 minutes, Passive 15 minutes, Total 20 minutes
- Flavor/Texture Hook: Viscous and tropically aromatic
- Perfect for: Coffee flavoring, pancake toppings, and reducing food waste
- Mastering the Golden Banana Syrup Recipe
- Key Techniques for Liquid Gold
- Understanding Component Roles and Science
- Pure Ingredients and Swaps
- Simple Tools for Success
- Clear Steps to Victory
- Pro Secrets and Fixes
- Scaling for Large Groups
- Debunking Common Kitchen Myths
- Storing Your Liquid Gold
- Perfect Pairings for Sweet Treats
- Recipe FAQs
- 📝 Recipe Card
Mastering the Golden Banana Syrup Recipe
Every time I see a bunch of speckled, almost black bananas on my counter, my brain used to go straight to baking. But let's be honest, we can only eat so much banana bread before it feels like a chore.
One morning, the smell of those sugary, intensely fragrant bananas hit me, and I realized I wanted that flavor in my coffee, not just in a loaf.
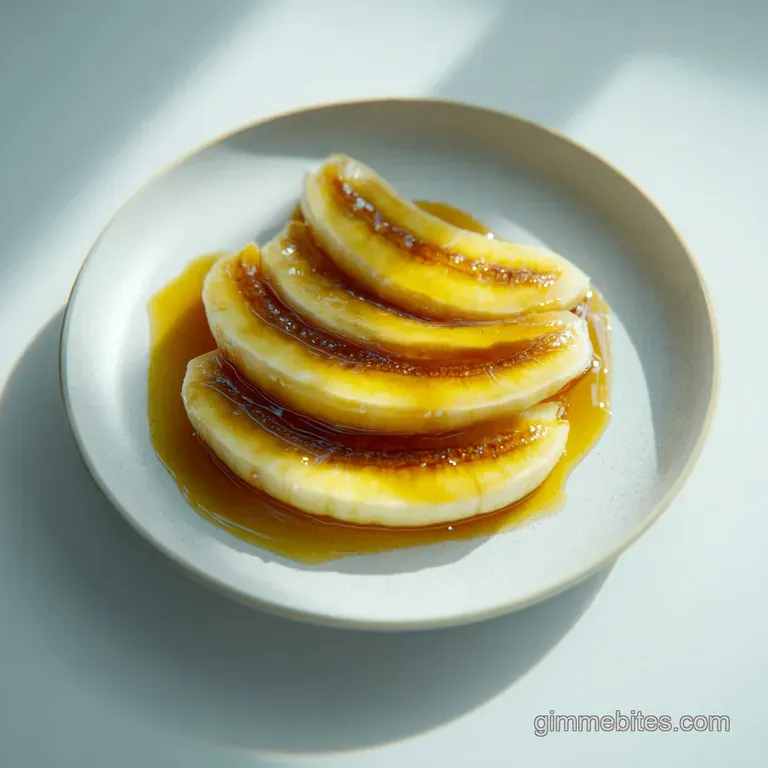
I decided to experiment with a stovetop infusion, and the result was life changing for my sweet tooth. The kitchen instantly filled with this warm, tropical aroma that felt like a vacation in a bottle. It’s thick, it's glossy, and it has this incredible depth that store-bought syrups just can’t touch.
We’re going to transform those mushy bananas into a velvety syrup that’ll make your morning lattes or weekend pancakes feel like a high end cafe treat. It’s one of those viral style kitchen hacks that actually lives up to the hype, and I can't wait for you to smell this simmering on your stove.
Key Techniques for Liquid Gold
There is a bit of magic happening in that saucepan that goes beyond just melting sugar. To get that clear, punchy flavor without the cloudiness, we have to respect the fruit's structure. Much like the technique used in my favorite Chocolate Bun Recipe, managing moisture and sugar balance is everything here.
- Hygroscopic Pull: The sugar molecules act like a magnet, drawing the natural juices and aromatic oils out of the banana slices through osmosis.
- Viscosity Control: Simmering the mixture at a low heat allows water to evaporate slowly, which concentrates the sugars into a thick, pourable consistency.
- Acid Stabilization: Adding lemon juice lowers the pH, which prevents the sucrose from recrystallizing into gritty bits as the syrup cools in the fridge.
| Method | Time | Texture | Best For |
|---|---|---|---|
| Stovetop Simmer | 15 minutes | Thick and glossy | Maximum flavor extraction |
| Oven Infusion | 30 minutes | Thin and clear | Large batches with less stirring |
| No Cook Maceration | 24 hours | Very thin/light | Delicate floral notes |
Choosing the stovetop method gives you the most control over the "sizzle" and the final thickness. It’s the quickest path from "gross bananas" to "glorious topping" and ensures the brown sugar fully carmelizes with the fruit.
Understanding Component Roles and Science
When we look at our ingredients, each one has a specific job to do. We aren't just sweetening water; we're creating a stable emulsion of fruit essence and sugar.
The Physics of the Infusion Sugar molecules physically disrupt the pectin in the fruit, while heat breaks down the starch into simpler sugars. This two pronged attack ensures every bit of "banana ness" ends up in your jar.
| Ingredient | Science Role | Pro Secret |
|---|---|---|
| Overripe Bananas | Flavor Source | Use bananas with black spots for the highest sugar concentration. |
| Light Brown Sugar | Caramelization | The molasses content adds a deeper, toffee like note compared to white sugar. |
| Lemon Juice | pH Balancer | Prevents the syrup from turning into a solid block of sugar in the fridge. |
| Sea Salt | Flavor Enhancer | A tiny pinch suppresses bitterness and makes the sweetness "pop" on your tongue. |
A quick note on the fruit if your bananas aren't spotted yet, wait another day. The starch to sugar conversion isn't finished until that skin looks a little bit sad. Trust me, the uglier the banana, the better the syrup recipe will turn out.
Pure Ingredients and Swaps
You probably have everything you need in your pantry right now. I always keep light brown sugar on hand because it’s so versatile for easy baking projects. This list is simple, but the quality of your vanilla really shines through in the finished product.
- 2 large overripe bananas: Sliced (approx. 250g). Why this? High amylase levels mean more natural sweetness and better aroma.
- 1 cup Filtered water: (240ml). Why this? Using filtered water ensures no chlorine taste interferes with the fruit.
- 0.75 cup Light brown sugar: (150g). Why this? Adds a hint of molasses that mimics a Bananas Foster flavor.
- 1 tsp Pure vanilla extract: (5ml). Why this? Rounds out the sharp sweetness with warm, woody notes.
- 1 tsp Freshly squeezed lemon juice: (5ml). Why this? The acidity brightens the heavy fruit notes and preserves the color.
- 0.125 tsp Sea salt: Why this? Sharpens the flavor profile so it doesn't taste "flat."
| Original Ingredient | Substitute | Why It Works |
|---|---|---|
| Light Brown Sugar | Coconut Sugar | Adds a toasted, nutty flavor. Note: Will make the syrup much darker. |
| Lemon Juice | Apple Cider Vinegar | Provides necessary acidity. Note: Adds a slight tangy, fruity fermented note. |
| Pure Vanilla Extract | Bourbon | Provides a rich, smoky depth. Note: Best for adult desserts or pancakes. |
Simple Tools for Success
You don't need a high tech lab to make a killer syrup recipe. I usually reach for my heavy bottomed stainless steel saucepan because it distributes heat evenly, preventing the sugar from scorching at the edges.
A fine mesh sieve is your best friend here. If you want a clear, professional looking syrup, don't use a chunky colander. You want something that will catch all those little banana fibers.
If you’re feeling extra fancy, you can even line the sieve with cheesecloth for a crystal clear finish that looks beautiful in a glass bottle.
Make sure you have a clean glass jar ready for storage. I love using old jam jars or even a recycled maple syrup bottle. Just give it a good scrub with hot soapy water first. Having your storage container ready means you can pour the syrup while it’s still warm and fluid.
Clear Steps to Victory

Right then, let's get cooking. This process is quick, so keep your eyes (and nose) on the pan. You're looking for that moment when the aroma shifts from "raw fruit" to "caramelized heaven."
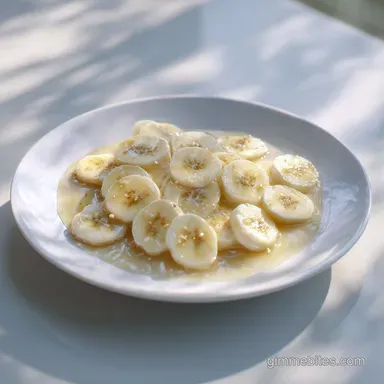
- Prep the fruit. Peel and slice your 2 overripe bananas into 1cm rounds. Note: More surface area means faster flavor extraction.
- Combine base. Place the sliced bananas, 240ml water, and 150g light brown sugar into a medium saucepan.
- Start the heat. Set the stove to medium and stir gently until the sugar dissolves completely.
- Bring to simmer. Let the mixture reach a gentle bubble. You should hear a light hissing and popping as the fruit softens.
- Simmer low. Reduce heat to low and cook for 15 minutes. Watch for the liquid to turn golden brown.
- Infuse flavors. Stir in the 5ml vanilla extract, 5ml lemon juice, and sea salt. Smell for that hit of warm vanilla.
- Check thickness. The syrup is done when it coats the back of a spoon. Note: It will thicken significantly as it cools.
- Strain carefully. Set a fine mesh sieve over a bowl and pour the mixture through. Let it drip naturally without pressing for a clearer syrup.
- Final cool. Let the syrup sit at room temperature for 30 minutes until it reaches a velvety consistency.
- Bottle it up. Transfer to your glass jar and seal tightly.
Pro Secrets and Fixes
The most common mistake I see? People get impatient and mash the bananas into the liquid. While it seems like it would add more flavor, it actually just releases extra pectin and solids, leaving you with a cloudy, gloopy mess instead of a sleek syrup.
Why is my syrup cloudy?
If you pressed the bananas through the sieve to get "every last drop," you likely pushed fruit solids into the liquid. It's still safe to eat, but it won't have that jewel like clarity. Next time, let gravity do the work.
Why did it turn into candy?
If your syrup is too thick to pour once cold, you probably simmered it for too long or at too high a temperature. This evaporates too much water, pushing the sugar toward the "hard ball" stage. You can usually fix this by whisking in a tablespoon of boiling water.
| Problem | Root Cause | Solution |
|---|---|---|
| Gritty Texture | Sugar Crystallization | Reheat gently with a splash of water and extra lemon juice. |
| Weak Flavor | Under ripe Bananas | Use fruit with significant black spotting on the peel. |
| Burnt Aftertaste | High Heat | Keep the simmer very low; sugar burns quickly above 160°C. |
Common Mistakes Checklist
- ✓ Never leave the pot unattended; sugar can go from caramel to burnt in seconds.
- ✓ Use a heavy bottomed pan to prevent "hot spots" that scorch the fruit.
- ✓ Don't skip the salt; it's the secret to making the banana flavor feel three dimensional.
- ✓ Ensure your storage jar is completely dry before filling to prevent spoilage.
- ✓ Wait for the full 15 minutes of simmering to ensure the flavor is concentrated.
Scaling for Large Groups
If you're hosting a big brunch and need to double this, it's pretty straightforward. However, sugar chemistry doesn't always scale linearly. If you double the water and sugar, the evaporation takes longer, so you might need to simmer for 20-25 minutes instead of 15.
When scaling down for a single serving, use one small banana and cut the other ingredients in half. Since the volume is so low, use your smallest butter warmer or a tiny saucepan to prevent the liquid from evaporating too quickly before it has time to infuse.
| Servings | Bananas | Sugar | Water | Cook Time |
|---|---|---|---|---|
| 12 (Half Batch) | 1 large | 75g | 120ml | 12 minutes |
| 24 (Standard) | 2 large | 150g | 240ml | 15 minutes |
| 48 (Double) | 4 large | 225g | 430ml | 25 minutes |
Note: For large batches, I reduce the sugar and water slightly (as shown above) to account for the slower evaporation rate in a larger pot.
If you're serving this alongside something savory, like my recipe for crack green beans, it makes for a wild but delicious sweet and salty brunch spread.
Debunking Common Kitchen Myths
One big myth is that you can't overcook syrup. People think "more time equals more flavor," but in reality, after about 20 minutes, you start losing those delicate banana aromatics and end up with just a generic burnt sugar taste.
Another one I hear a lot is that you need to add corn syrup to make it smooth. While corn syrup does prevent crystallization, our lemon juice does the exact same job naturally by breaking down the sucrose. You don't need extra additives if your pH balance is right.
Finally, some people swear you have to peel the bananas and freeze them first. Honestly? Don't even bother. Fresh, overripe bananas at room temperature actually release their juices more easily into the warm sugar base than frozen ones, which can sometimes water down the final product.
Storing Your Liquid Gold
This syrup is pretty hardy thanks to the high sugar content, but it still needs a little care. Keep it in the back of the fridge where the temperature is most consistent. It’ll stay fresh for about 2 weeks, though the flavor is always peak within the first 5 days.
If you find yourself with way too much syrup, it actually freezes surprisingly well. Pour it into an ice cube tray! Once frozen, pop the "syrup cubes" into a freezer bag. You can drop a single cube into a hot cup of coffee, and it’ll melt instantly, sweetening and flavoring your drink at the same time.
For zero waste, don't throw away those leftover simmered banana slices! Even though we've extracted most of the juice, they are basically candied fruit now. Stir them into oatmeal or fold them into a quick batch of muffin batter. It’s a great way to ensure absolutely nothing goes to waste.
Perfect Pairings for Sweet Treats
This syrup is a total shapeshifter in the kitchen. My favorite way to use it is as a coffee sweetener it turns a basic latte into something that tastes like a liquid banana nut muffin. If you're craving a full breakfast spread, this syrup is a dream over my Grape Nuts with recipe which adds a much needed crunch to the velvety liquid.
- The Brunch Duo
- Drizzle it over thick cut French toast with a side of crispy bacon.
- The Dessert Hack
- Pour it warm over high-quality vanilla bean ice cream.
- The Tropical Soda
- Mix 2 tablespoons with sparkling water and a squeeze of lime for a refreshing banana spritz.
It’s also incredible as a glaze for other baked goods. Try brushing it over warm cakes or even using it as a dipping sauce for churros. Once you have a jar of this in your fridge, you'll start finding excuses to put it on everything. Trust me on this one your sweet tooth will thank you.

Recipe FAQs
How do you make banana syrup?
Combine bananas, water, and brown sugar, then simmer gently. Heat the mixture on medium until the sugar dissolves, then reduce to a low simmer for 15 minutes until the liquid reduces slightly and takes on a golden hue. Strain through a fine mesh sieve to remove solids.
How to make caramelized banana syrup?
Use light brown sugar and maintain a low simmer for the full 15 minutes. The molasses content in brown sugar helps promote deeper caramelization during the slow cooking process. Adding a small pinch of salt enhances the perception of sweetness, mirroring a true caramel flavor.
What are the benefits of banana syrup?
The primary benefit is reducing food waste while adding deep, tropical flavor. It concentrates the intense sugars of overripe bananas into a versatile, shelf stable topping. If you enjoyed mastering the slow flavor infusion here, apply the same principle for deep flavor extraction in our Cajun Cream Sauce recipe.
Does homemade banana bread syrup need to be refrigerated?
Yes, homemade banana syrup requires refrigeration after cooling. Since it contains natural fruit sugars and moisture, storing it in an airtight container in the fridge will keep it fresh for up to two weeks. Always ensure the syrup is cooled before sealing the jar tightly.
Can I use frozen bananas to make banana syrup?
No, fresh, very ripe bananas are strongly recommended over frozen ones. Frozen fruit releases excess moisture when heated, which can dilute the syrup base and require significantly longer simmering times to reach the correct viscosity.
Why is my banana syrup gritty after it cools down?
The grittiness indicates that the sugar recrystallized during cooling. This usually happens if you didn't add an acid like lemon juice, or if you boiled the mixture too rapidly. Reheating the syrup gently with a tablespoon of hot water and extra lemon juice often resolves the texture issue.
What is the best way to store the finished banana syrup?
Store it in a clean, sterilized, airtight glass jar in the refrigerator. This keeps the syrup fresh for about 14 days, allowing the flavors to continue melding beautifully. For a different kind of shelf stable treat, you might want to check out our Butter Toffee Pretzels recipe which relies on precise sugar cooking.
Banana Syrup Recipe Simple
Ingredients:
Instructions:
Nutrition Facts:
| Calories | 33 kcal |
|---|---|
| Protein | 0.1 g |
| Fat | 0.1 g |
| Carbs | 8.5 g |
| Fiber | 0.1 g |
| Sugar | 7.3 g |
| Sodium | 16 mg |
