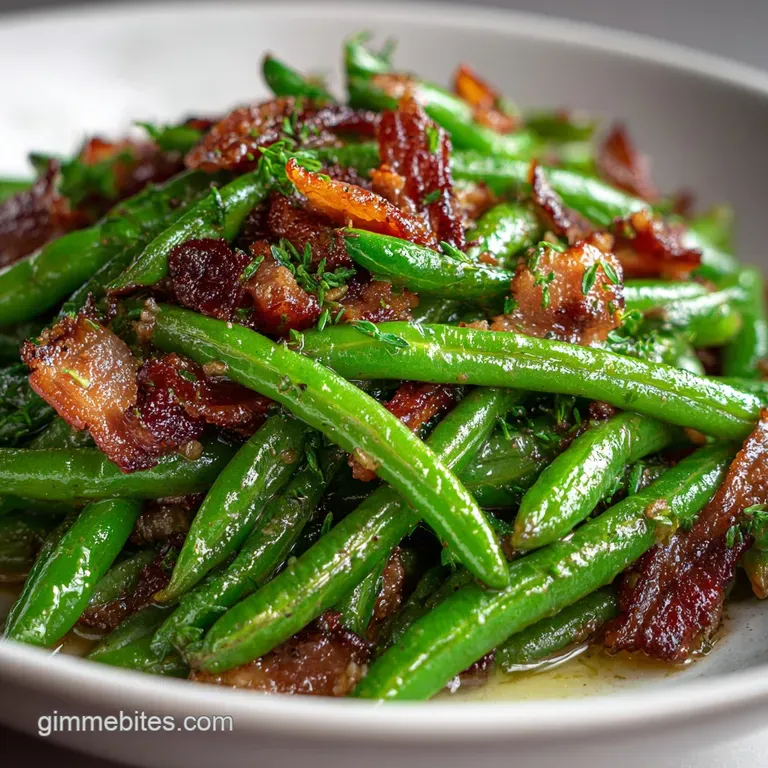
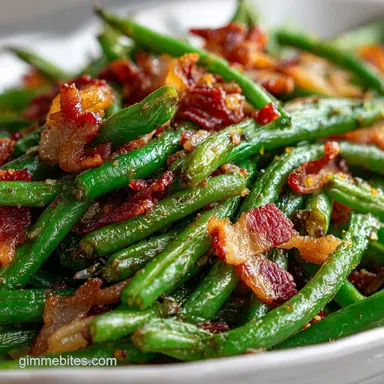
Recipe for Crack Green Beans with Soy Butter Glaze
- Time: Active 15 minutes, Passive 35 minutes, Total 50 minutes
- Flavor/Texture Hook: A shimmering, syrupy glaze with a salty bacon crunch
- Perfect for: Holiday potlucks, Sunday family dinners, or a reliable weeknight comfort meal
- Secrets to a Hearty Recipe for Crack Green Beans
- Planning Your Reliable Side Dish
- Essential Ingredients for Rich Flavor
- Kitchen Tools for Easy Cooking
- Mastering the Step-by-Step Process
- Solving Common Cooking Issues
- Simple Dietary and Flavor Variations
- Smart Storage and Reheating Tips
- Serving Suggestions for Family Meals
- Recipe FAQs
- 📝 Recipe Card
Secrets to a Hearty Recipe for Crack Green Beans
I still remember the first time I brought this dish to my sister’s annual Thanksgiving dinner. The kitchen was a chaotic mess of steam and flour, but the second I pulled these beans out of the oven, the room went quiet for just a beat.
That specific aroma of rendered bacon fat swirling into caramelizing brown sugar is a sensory trigger that says "comfort" louder than any other dish on the table. Before I could even find a serving spoon, my nephews were already "testing" the bacon bits right off the top.
The beauty of this recipe for crack green beans is how it takes the humblest ingredients canned beans and basic spices and turns them into something that feels like a decadent treat.
I’ve made the mistake of trying to use fancy, fresh trimmed haricots verts before, but honestly, they just don't soak up the glaze the same way. There is something about the way canned beans are already softened that allows them to act like a sponge for that liquid gold mixture of butter, soy, and garlic.
It is a reliable, stick to your ribs side that has become a permanent request at every family gathering we host.
Right then, let's get into what actually makes these work. We aren't just tossing things in a pan and hoping for the best. We are building layers of flavor, starting with that smoky bacon and ending with a glaze that has just enough heat from the red pepper flakes to keep things interesting.
Trust me on this: once you see how fast these disappear, you'll understand why the name stuck.
Planning Your Reliable Side Dish
Lipid Bridging: The bacon fat and melted butter act as a carrier for the garlic and onion powders, ensuring the spices coat every inch of the bean rather than clumping.
Osmotic Absorption: Because canned beans have a higher moisture content, they swap some of their internal water for the sugary soy glaze during the 35 minutes of baking.
Sugar Concentration: The 2/3 cup of light brown sugar reduces into a syrup that provides a protective coating, preventing the beans from drying out in the oven.
| Method | Time | Texture | Best For |
|---|---|---|---|
| Oven (Standard) | 35 minutes | Syrupy and glazed | Traditional holidays |
| Slow Cooker | 4 hours | Very tender and deep | Hands off potlucks |
| Stovetop | 20 minutes | Crispy but less infused | Quick weeknight meals |
Using a slow cooker is a great way to save oven space, much like when I'm prepping a large batch of my Sourdough Buns Recipe for a crowd. However, the oven method is the gold standard for getting those slightly chewy, caramelized edges on the bacon that everyone craves.
Essential Ingredients for Rich Flavor
To understand why this dish is so addictive, we have to look at how the components play together. We aren't just using sugar for sweetness; we're using it to create a specific mouthfeel that coats the tongue.
| Ingredient | Science Role | Pro Secret |
|---|---|---|
| Bacon Fat | Flavor Base | Use regular cut bacon; thick cut won't crisp as evenly in the glaze. |
| Soy Sauce | Umami Provider | Regular soy sauce adds the necessary salt and depth that balances the sugar. |
| Brown Sugar | Viscosity Agent | Packed light brown sugar contains molasses, which helps the glaze stick to the beans. |
For the Base
The foundation starts with 5 cans (14.5 oz each) of whole green beans. Make sure you drain them well; any extra canning liquid will thin out your glaze and prevent it from becoming that velvety consistency we want. You will also need 12 slices of regular cut bacon, chopped into half inch pieces.
This might seem like a lot of bacon, but it provides the essential salty contrast to the sugar.
For the Glaze
The magic happens with 1/2 cup of unsalted butter, melted, combined with 2/3 cup packed light brown sugar. To this, we add 1/4 cup regular soy sauce, 1.5 teaspoons garlic powder, 1 teaspoon onion powder, and 1/2 teaspoon red pepper flakes.
Don't forget the 1 tablespoon of reserved bacon drippings this is the secret to that "old-fashioned" flavor that makes the dish feel truly homemade.
| Original Ingredient | Substitute | Why It Works |
|---|---|---|
| Unsalted Butter | Salted Butter | Works fine, but reduce the soy sauce by 1 tablespoon to avoid oversaltiness. |
| Light Brown Sugar | Dark Brown Sugar | Adds a deeper molasses flavor. Note: Will make the glaze darker and slightly more bitter. |
| Soy Sauce | Tamari | Keeps the dish gluten-free while maintaining the savory umami profile. |
| Red Pepper Flakes | Cayenne Powder | Use only 1/4 teaspoon. Adds heat without the visual flakes. |
Kitchen Tools for Easy Cooking
You don't need a high end kitchen to pull this off, but a few specific items make the process much smoother. I always reach for my heavy 9x13 inch glass baking dish. Glass is great here because it allows you to see if the glaze is bubbling and thickening at the bottom without having to disturb the beans too much.
A solid cast iron skillet is my go to for rendering the bacon. It holds heat so evenly that you get a consistent sizzle across all 12 slices. You’ll also want a small whisk and a microwave safe bowl for the glaze.
Whisking the soy sauce into the melted butter and sugar is crucial if you just pour them in separately, they won't emulsify, and you'll end up with a greasy layer on top of your beans.
Chef's Tip: Freeze your bacon for 10 minutes before chopping. It firms up the fat, making it much easier to get those clean 1/2 inch pieces without the meat sliding around under your knife.
Mastering the step-by-step Process

Following a logical flow ensures you aren't rushing while the oven is preheating. I like to get the bacon going first because it takes the longest to prep.
- Preheat and Prep: Set your oven to 350°F and grease a 9x13 inch baking dish lightly.
- Drain the Beans: Open all 5 cans of green beans and drain them thoroughly in a colander. Note: Shake the colander well to remove trapped water inside the beans.
- Render the Bacon: Fry the chopped bacon pieces in a skillet over medium heat until they are just starting to crisp.
- Save the Liquid: Remove the bacon with a slotted spoon and set aside. Reserve 1 tablespoon of the warm bacon drippings.
- Arrange the Foundation: Place the drained green beans in the baking dish and scatter the par cooked bacon evenly over the top.
- Emulsify the Glaze: In a medium bowl, whisk together the melted butter, brown sugar, soy sauce, garlic powder, onion powder, and red pepper flakes.
- Add the Secret: Stir that reserved tablespoon of bacon drippings into the glaze until the mixture is shimmering and smooth.
- Coating the Dish: Pour the glaze evenly over the beans and bacon, ensuring every bean gets a little bit of the liquid.
- Bake to Finish: Place in the oven for 35 minutes until the sauce is bubbling and the bacon is fully browned.
- Rest and Set: Let the dish sit for 5 minutes before serving to allow the glaze to thicken as it cools slightly.
While the beans are in the oven, it's the perfect time to finish up your main course. This recipe pairs beautifully with a Braised Mock Tenderloin recipe because the sweetness of the beans cuts through the richness of the beef.
Solving Common Cooking Issues
Even the most reliable recipes can hit a snag if the ingredients behave unexpectedly. The most common issue people face is a glaze that feels too thin or oily.
Why Your Glaze Is Watery
If your dish looks more like soup than a glazed side, it usually comes down to the beans. Canned beans hold a surprising amount of water. If you don't drain them well, that water releases during the bake and thins out your sugar butter mixture.
Another culprit could be under baking; that sugar needs time to reduce into a syrup.
| Problem | Root Cause | Solution |
|---|---|---|
| Glaze is too thin | Excess bean liquid | Drain beans for 10 mins in a colander before adding to the dish. |
| Too salty | Bacon brand or soy type | Use "low sodium" soy sauce or unsalted butter to control the salt. |
| Bacon is chewy | Not par cooked enough | Sizzle the bacon until the edges are golden before adding to the oven. |
Common Mistakes Checklist ✓ Never skip the par cooking of the bacon; it won't crisp up properly in the liquid glaze alone. ✓ Use a whisk for the glaze to ensure the soy sauce and butter are fully combined.
✓ Don't substitute fresh beans without blanching them first, or they will stay too tough. ✓ Let the dish rest for at least 5 minutes after baking so the glaze can "grab" onto the beans.
Simple Dietary and Flavor Variations
If you are cooking for a crowd with different needs, you can easily tweak this recipe without losing that "crack" appeal. For a vegetarian version, you can swap the bacon for smoked almonds added at the very end and use a tablespoon of olive oil instead of bacon drippings.
The smoke from the almonds mimics the bacon flavor quite well.
For those looking for a keto friendly option, you can replace the brown sugar with a brown sugar alternative like Swerve. Keep in mind that sugar substitutes don't always thicken the same way as real sugar, so you might need to simmer the glaze on the stovetop for a few minutes with a pinch of xanthan gum to get that velvety texture.
Scaling for Big Crowds
If you are doubling this for a massive party, use two separate 9x13 dishes rather than one deep one. If the beans are piled too high, the ones in the middle won't get that caramelized glaze.
When doubling, I usually only increase the red pepper flakes to 3/4 teaspoon instead of a full teaspoon to keep the heat manageable for everyone.
Smart Storage and Reheating Tips
Leftovers are actually a treat with this dish because the flavors continue to meld overnight. You can store these in an airtight container in the fridge for up to 4 days. When you're ready to eat, skip the microwave if you can.
Reheating them in a skillet over medium heat allows the glaze to re emulsify and the bacon to regain a bit of its texture.
I don't typically recommend freezing these beans. The texture of canned beans can become somewhat grainy after freezing and thawing. However, if you have extra glaze, you can freeze that in an ice cube tray! Use those frozen glaze cubes to flavor sautéed carrots or even a quick stir fry.
It's a great way to ensure zero waste in the kitchen.
Serving Suggestions for Family Meals
These beans are the ultimate "chameleon" side dish. They are fancy enough for a Christmas spread but simple enough for a Tuesday night. I love serving them alongside something hearty and reliable, like a roasted chicken or a thick pork chop. The sweetness of the glaze is a natural partner for savory meats.
If you are putting together a full spread, consider the textures on the plate. Since these beans are soft and syrupy, pair them with something crunchy or starchy. They go incredibly well with a Turkey Jerky Recipe snack platter if you're doing a casual game day buffet.
Myth: Fresh is Always Better
There is a common kitchen myth that fresh beans always produce a better result. In this specific recipe, that’s just not true. Fresh beans have a structural integrity that resists the sugar.
Canned beans have already had their cell walls softened, which is exactly why they can absorb the bacon fat and soy sauce so deeply. Don't feel guilty about reaching for the cans!
Myth: Soy Sauce Makes it "Asian"
While soy sauce is a staple in many cuisines, here it functions purely as a source of liquid umami and salt. When combined with butter and brown sugar, it loses its distinct "soy" identity and transforms into a deep, savory caramel that tastes more like a classic Southern glaze than anything else.
Trust the process and don't be afraid of the bottle!

Recipe FAQs
Can crack green beans be made ahead of time?
Yes, leftovers are great. Flavors continue to meld overnight, making them even better the next day when reheated slowly in a skillet.
Why do restaurant green beans taste so good?
Restaurants often use fat and sugar heavily. Restaurant versions usually rely on rendering bacon fat and simmering the vegetables in a concentrated, high sugar reduction like this recipe does.
What are crack green beans?
They are canned green beans baked in a sweet and savory glaze. The addictive name comes from the intensely flavorful, shimmering glaze made of bacon fat, butter, soy sauce, and brown sugar.
What is the best method to cook green beans for this recipe?
The oven method provides the gold standard texture. Baking for 35 minutes creates slightly chewy, caramelized edges on the bacon and thickens the glaze perfectly.
Can I substitute fresh green beans for canned?
No, stick with canned for this recipe. Fresh beans have structural integrity that resists deep flavor absorption; canned beans soften better to soak up the thick, sugary glaze.
How do I prevent the glaze from being too watery?
Drain the canned beans extremely well before baking. Excess water releases during the cooking time, thinning out the sugar and butter mixture; shake the colander vigorously.
How to build the bacon flavor base?
Render the bacon until it is just starting to crisp. Remove the bacon pieces but reserve 1 tablespoon of the warm drippings to whisk directly into the final glaze mixture.
Crack Green Beans Recipe
Ingredients:
Instructions:
Nutrition Facts:
| Calories | 278 kcal |
|---|---|
| Protein | 7.4 g |
| Fat | 16.8 g |
| Carbs | 27.2 g |
| Fiber | 3.1 g |
| Sugar | 19.2 g |
| Sodium | 795 mg |
