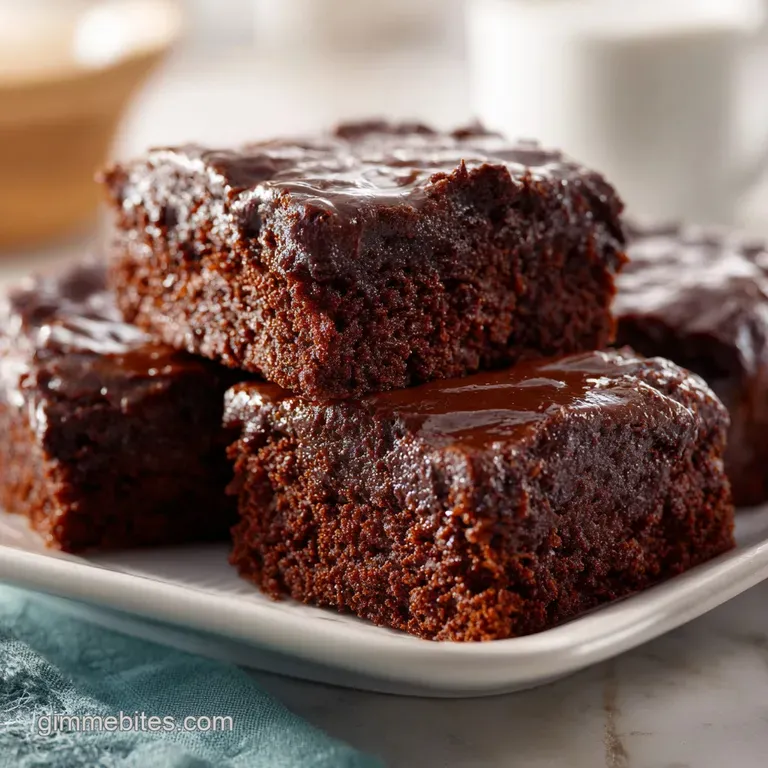
Chocolate Snack Cakes: Moist and Fudgy
- Time: Active 25 minutes, Passive 25 minutes, Total 50 minutes
- Flavor/Texture Hook: Snappy chocolate shell over a velvety marshmallow cloud
- Perfect for: Nostalgic parties, viral food gifts, or curing a massive sweet tooth
- Achieving the Best Texture Results
- Selecting Your Chocolate Essentials
- Tools for Bakery Quality
- Mastering the Fudgy Process
- Fixing Texture and Coating Errors
- Creative Flavor Customizations
- Freshness and Freezing Tips
- Serving and Plating Ideas
- Debunking Common Kitchen Beliefs
- Recipe FAQs
- 📝 Recipe Card
Achieving the Best Texture Results
- Blooming the Cocoa: Pouring boiling water over cocoa powder "blooms" the solids, releasing hidden flavor compounds and ensuring a lump free, intense chocolate base.
- Marshmallow Stability: Using marshmallow fluff instead of just whipped cream creates a filling that holds its shape inside the cake without soaking into the crumb.
- Oil vs Butter: Neutral oil keeps the cake moist even when refrigerated, preventing that "stiff" texture that butter based cakes get when cold.
- Coconut Oil Shine: Adding coconut oil to the chocolate chips creates a thinner, glossier glaze that shatters perfectly rather than bending like fudge.
| Method | Time | Texture | Best For |
|---|---|---|---|
| Standard Oven | 25 minutes | Spongy and even | Classic bakery results |
| Convection | 20 minutes | Slightly crisper edges | Those who like "edge" pieces |
| Toaster Oven | 28 minutes | Denser crumb | Small batches or quick fixes |
The magic of these cakes lies in how the moisture is trapped. Because we use boiling water, the starch in the flour begins to gelatinize immediately, which leads to a much softer, more "snackable" bite. It's the difference between a standard birthday cake and something that feels like a gourmet confection. If you want to try another light as-air treat, check out my Chocolate Cloud for a different kind of cocoa experience.
| Ingredient | Science Role | Pro Secret |
|---|---|---|
| Dutch process Cocoa | Lowers acidity | Sift it twice to avoid "cocoa bombs" (bitter dry pockets) |
| Baking Soda | Chemical leavening | Activated by the heat of the boiling water and the egg |
| Boiling Water | Starch gelatinization | Must be 212°F to properly bloom the cocoa solids |
| Marshmallow Fluff | Structure stabilizer | Keeps the filling airy without needing constant refrigeration |
A massive mistake people make is using cold water. If the water isn't boiling, the cocoa stays "dusty" in the batter. You want that cocoa to fully integrate until the mixture looks like melted silk. This ensures the flavor is consistent in every single bite.
Selecting Your Chocolate Essentials
For the best Chocolate Snack Cakes, we need specific players. We are looking for 190g of all purpose flour to provide the structure not too much, or it gets bready. The 200g of granulated sugar provides sweetness and moisture, while the 45g of Dutch process cocoa is non negotiable for that dark, "Oreo like" color.
- 190g All purpose flour Why this? Provides enough protein for structure without being tough.
- 200g Granulated sugar Why this? Essential for moisture retention and a soft crumb.
- 45g Unsweetened Dutch process cocoa powder Why this? Gives that classic dark color and mellow flavor.
- 1 tsp Baking soda Why this? Reacts with heat to lift the dense batter.
- 0.5 tsp Fine sea salt Why this? Cuts through the sugar to highlight the cocoa.
- 240ml Boiling water Why this? Blooms the cocoa and hydrates the starch perfectly.
- 80ml Neutral oil Why this? Keeps the cake tender even when chilled.
- 1 large egg Why this? Binds the fats and liquids for a stable sponge.
- 1 tsp Pure vanilla extract Why this? Rounds out the chocolate with floral notes.
- 115g Unsalted butter Why this? Provides a rich base for the filling.
- 100g Marshmallow fluff Why this? The key to that signature "cloud" texture.
- 60g Powdered sugar Why this? Sweetens the filling without adding grit.
- 1 tbsp Heavy cream Why this? Thins the filling to a pipeable consistency.
- 175g Semi sweet chocolate chips Why this? Melts smoothly for a reliable shell.
- 2 tbsp Coconut oil Why this? Lowers the melting point for a snappy finish.
| Original Ingredient | Substitute | Why It Works |
|---|---|---|
| Neutral Oil (80ml) | Melted Butter (80ml) | Richer flavor, but the cake will be firmer when cold |
| Marshmallow Fluff (100g) | Mascarpone (100g) | Adds a tangy, creamy vibe; much less sweet |
| Boiling Water (240ml) | Hot Coffee (240ml) | Coffee intensifies chocolate notes without tasting like mocha |
Using hot coffee instead of water is a pro move if you want a "grown up" version of these cakes. The caffeine doesn't change the texture, but it acts like a magnifying glass for the cocoa. Just make sure it is piping hot to keep that blooming process on track.
Tools for Bakery Quality
You don't need a professional kitchen, but a few specific tools make this process infinitely smoother. An 8x8-inch square pan is the golden standard here. If you use a 9x9, the cakes will be thinner, which means they might be harder to stuff with filling.
You will also want a heat proof jug for blooming that cocoa glass or metal works best.
An electric hand mixer is vital for the filling. You want to whip that butter and marshmallow fluff until it looks like a cloud. If you try to do it by hand, you’ll end up with a greasy, heavy mess that doesn't have that "snack cake" lightness.
Finally, a small paring knife or even a clean piping tip is necessary for coring the cakes. You need a clean "chimney" in the center of the cake to hold the marshmallow surprise.
Chef's Tip: Use parchment paper and leave an "overhang" on two sides. This allows you to lift the entire block of cake out of the pan once it's cool, making slicing much cleaner.
Mastering the Fudgy Process
- Preheat your oven to 350°F (175°C) and line an 8x8-inch baking pan with parchment paper. Note: Parchment is better than grease for lifting.
- Whisk the all purpose flour, granulated sugar, baking soda, and sea salt in a large bowl. until no lumps remain.
- Bloom the cocoa by pouring 240ml boiling water over the cocoa powder in a heat proof jug, whisking until smooth. until it looks like dark liquid gold.
- Whisk the oil, egg, and vanilla into the cocoa mixture, then gently fold the wet ingredients into the dry ingredients until just combined. Note: Don't overmix or the cake gets tough.
- Pour the batter into the prepared pan and bake for 22–25 minutes. until the center springs back.
- Prepare the filling by beating the softened butter, marshmallow fluff, powdered sugar, and heavy cream with an electric hand mixer. until light and fluffy.
- Slice the cooled cake into 9 squares. Use a small paring knife or piping tip to core a small hole in the center of each square and pipe in the marshmallow filling. until the hole is overflowing slightly.
- Melt the chocolate chips and coconut oil together in 30 second intervals in the microwave, stirring until glossy. until completely smooth.
- Dip the top of each cake into the glaze and set on a wire rack to firm up. until the coating is matte and set.
- 1. The Bloom
- The water must be at least 210°F (99°C) to properly melt the cocoa fats.
- 2. The Internal Temp
- The cake is done when it hits 205°F (96°C) in the center.
- 3. The Glaze
- Allow the glaze to cool to 90°F (32°C) before dipping to avoid melting the filling.
Fixing Texture and Coating Errors

The most common heartbreak is a sunken center. This usually happens if you peek at the oven too early. When you open the door, the temperature drops, and the delicate air bubbles in the batter collapse before they are set. If this happens, don't panic just fill the "crater" with extra marshmallow fluff!
No one will ever know.
Why Your Cake Is Dry
If your cake feels like a desert, you likely overbaked it. Even 2 minutes too long in an 8x8 pan can suck the moisture out of 190g of flour. Use a toothpick; it should come out with a few moist crumbs, not totally clean.
Also, ensure your 80ml of oil was measured accurately fats are the insurance policy against dryness.
Why Your Filling Is Runny
A runny filling is usually the result of butter that was too soft. If the butter is oily or melted, it won't hold the air from the mixer. Use "room temperature" butter, which should still feel slightly cool to the touch and hold an indentation of your thumb without collapsing.
| Problem | Root Cause | Solution |
|---|---|---|
| Cracked Glaze | No coconut oil used | Always add the 2 tbsp coconut oil to soften the chocolate snap |
| Filling Leaks | Hole not deep enough | Core at least 3/4 of the way down into the cake square |
| Greasy Crumb | Under mixed batter | Whisk until no streaks of flour remain, but stop immediately after |
Common Mistakes Checklist
- ✓ Sift the cocoa powder before adding boiling water to prevent stubborn lumps.
- ✓ Let the cake cool 100% before filling, or the marshmallow fluff will melt into a syrup.
- ✓ Use Dutch process cocoa specifically; natural cocoa is too acidic for this recipe's balance.
- ✓ Tap the pan on the counter before baking to release large air bubbles.
- ✓ Wipe the knife between every single cut for those clean, bakery style edges.
Creative Flavor Customizations
If you want to scale this recipe down for a tiny snack session, you can halve everything. For the egg, beat one large egg in a cup and use exactly 25g of the liquid. It’s a bit of a pain, but it keeps the chemistry perfect. Scaling up is easier; just double the ingredients and use two 8x8 pans.
Never try to bake a double batch in one deep pan, or the outside will burn while the inside stays raw.
| Servings | Ingredient Adjustments | Pan Size | Cook Time |
|---|---|---|---|
| 9 Cakes | 1 batch as written | 8x8 inch | 25 minutes |
| 18 Cakes | Double ingredients | Two 8x8 pans | 28 minutes |
| 36 Cakes | 4x ingredients (Spices 1.5x) | Four 8x8 pans | 30 minutes |
If you are feeling adventurous, you can turn these into a different kind of treat. For another festive idea, my Smash Cake 1st Birthday recipe offers a totally different vibe for the little ones. Or, if you want to keep the snack cake theme but go even bigger, you can use these base steps to make a giant version in a loaf pan.
For a Deep Mocha Twist
Add 1 tablespoon of espresso powder to the dry ingredients. The caffeine compounds react with the 45g of cocoa to create a flavor that is much more sophisticated and less "sweet."
For a dairy-free Alternative
Swap the 115g of butter for a vegan stick butter (like Miyoko's) and use a dairy-free heavy cream or full fat coconut milk. Most marshmallow fluff is dairy-free by default, but always check the label!
| Comparison | Fast Version | Classic Version |
|---|---|---|
| Prep Time | 10 minutes (Box mix) | 25 minutes (Scratch) |
| Texture | Spongy/Foamy | Fudgy/Velvety |
| Flavor | Artificial Vanilla | Deep Dutch Cocoa |
Freshness and Freezing Tips
Because we used oil instead of butter in the sponge, these Chocolate Snack Cakes stay incredibly moist in the fridge for up to 5 days. However, the chocolate shell can get a bit sweaty if there is too much humidity.
I recommend storing them in a single layer in an airtight container with a piece of paper towel tucked in the corner to absorb extra moisture.
For long term storage, these cakes freeze beautifully. Wrap each square individually in plastic wrap before the chocolate glaze has been added, or after it has fully set. They will stay fresh in the freezer for 2 months. To eat, just let them sit on the counter for 30 minutes.
Don't microwave them, or you’ll end up with a marshmallow explosion!
To practice zero waste, save any cake cores you removed. Crumble them up, mix with a little leftover marshmallow filling, and roll them into "cake truffles." Dip those in the leftover chocolate glaze, and you have a "bonus" snack that uses every single scrap of the 190g of flour you started with.
Serving and Plating Ideas
While these are meant to be grabbed with your hands, you can definitely make them feel like a fancy dessert. Serve one on a white plate with a smear of raspberry coulis to cut through the 47.9g of sugar. The bright acidity of the berries plays perfectly against the dark cocoa.
For an Elegant Plating
Dust the tops with a tiny pinch of flaky sea salt (like Maldon) right after dipping them in the chocolate. The contrast between the salt crystals and the glossy glaze looks professional and balances the sweetness of the marshmallow fluff.
For a Classic Pairing
Nothing beats a cold glass of whole milk. The fat in the milk cleanses the palate of the heavy cocoa, making every bite feel like the first one. If you're looking for more inspiration for cake based sweets, my Cherry Chip Cake Recipe is another fantastic option for those who love a fluffy base.
Debunking Common Kitchen Beliefs
One huge myth is that you can substitute natural cocoa for Dutch process 1:1. Dutch process cocoa has been treated with alkali to neutralize its acidity. Since our recipe uses 1 tsp of baking soda (which needs an acid to react), switching the cocoa type can mess with the rise.
In this specific "snack cake" chemistry, the boiling water and the egg provide enough of a kick, but the flavor will be significantly more bitter and the color much lighter if you use natural cocoa.
Another misconception is that the filling needs to be refrigerated at all times. Because marshmallow fluff is primarily sugar and egg whites that have been heat treated, and we are using 60g of powdered sugar as a stabilizer, the filling is actually quite shelf stable for a day at room temperature.
However, for the best "snap" on that chocolate shell, keeping them cool is always the better move.
Finally, people think you need a double boiler for the glaze. Honestly, the microwave is your best friend here. If you go in 30 second bursts and stir aggressively between them, the residual heat will melt the chocolate chips safely without the risk of seizing them over a pot of steam.
Just be patient and don't rush the heat!
- If you want a thicker shell
- Dip the cakes once, let them set in the fridge for 10 minutes, and then dip them a second time.
- If you want a lighter cake
- Sift the 190g of flour three times to incorporate as much air as possible before whisking.
- If you want a richer filling
- Add a tiny pinch of salt to the butter and marshmallow mixture to make the vanilla notes pop.

Recipe FAQs
What happened to traditional commercial snack cakes?
Many legacy brands have struggled with supply chain shifts and corporate restructuring. Homemade versions are becoming more popular because they rely on fresh, high-quality ingredients like Dutch process cocoa instead of the preservatives found in store-bought options.
Do they still sell authentic Suzy Q's?
Availability varies significantly by region due to changes in brand ownership. If you cannot find them in your local market, creating your own version using this 50-minute recipe allows you to control the exact sweetness and texture.
What is Oprah's favorite type of chocolate cake?
She has historically favored rich, deeply chocolatey cakes with a dense, moist crumb. While her specific preference changes, this recipe mirrors that decadence by blooming the cocoa powder in boiling water to intensify the chocolate profile.
What cake is safe for diabetics?
No standard flour and-sugar chocolate cake is considered safe for a diabetic diet. If you require dietary alternatives, you may find success adapting the moisture balancing techniques used in our GF carrot cake to suit specific nutritional needs.
How to prevent the marshmallow filling from melting?
Cool your cake completely to room temperature before adding the filling. If you inject the mixture into a warm cake, the marshmallow fluff will lose its structure and turn into a syrup.
How to get clean, bakery style edges on the squares?
Wipe your knife with a damp cloth between every single cut. This simple action prevents loose crumbs from dragging across the surface and preserves the sharp, professional lines of your cakes.
Is it true I can use any cocoa powder for this recipe?
No, this is a common misconception. You must use Dutch process cocoa because its specific pH balance is essential to how the baking soda reacts, ensuring the cake rises properly and achieves a dark, deep color.
Homemade Chocolate Snack Cakes
Ingredients:
Instructions:
Nutrition Facts:
| Calories | 533 kcal |
|---|---|
| Protein | 4.7 g |
| Fat | 28.3 g |
| Carbs | 68 g |
| Fiber | 3.8 g |
| Sugar | 47.9 g |
| Sodium | 278 mg |
