Homemade Vanilla Milk: Silky and Sweet
- Time: Active 3 minutes, Passive 0 minutes, Total 3 minutes
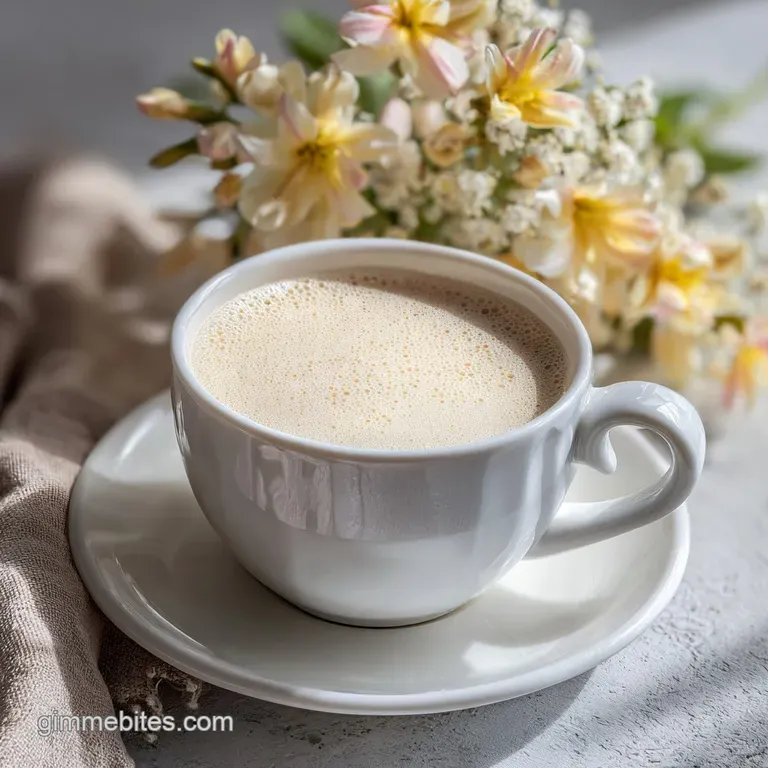
- Flavor/Texture Hook: Silky, floral sweetness with a velvety micro foam head
- Perfect for: Late night sweet cravings, kid friendly treats, or a viral style coffee topper
- Mastering This Silky Vanilla Milk at Home
- Why Cold Emulsification Creates a Velvety Texture
- Crucial Numbers for the Best Vanilla Milk
- Selecting the Best Components for Floral Sweetness
- Simple Tools for a Frothy Milk Finish
- Steps to Creating This Fragrant Dairy Treat
- Common Texture Issues and Simple Fixes
- Adjusting This Treat for Various Dietary Needs
- Preservation Strategies for Your Homemade Vanilla Milk
- Creative Ways to Enjoy This Sweet Infusion
- Myths About Homemade Flavored Milk
- Recipe FAQs
- 📝 Recipe Card
Mastering This Silky Vanilla Milk at Home
Have you ever stood in front of the fridge at 11 PM with a massive sweet tooth, but nothing in the pantry looks good? I used to just pour a glass of milk and dump in a teaspoon of vanilla, thinking it would be a quick fix. It was a total disaster every single time.
The extract didn't actually mix with the cold milk fats; it just floated on top like a boozy oil slick, leaving the actual milk tasting bland and watery. It was honestly heartbreaking when all you want is a sweet, floral hug in a glass.
The secret I finally stumbled upon involves treating the vanilla and sweetener as a separate base. By dissolving the salt and maple syrup into the extract first, you create a translucent gold syrup that actually binds to the milk molecules.
When you finally take that first sip, the aroma hits you before the liquid even touches your tongue that deep, woody scent of real vanilla bean paired with the earthy sweetness of maple. It is a complete sensory experience that makes store-bought versions taste like flavored chalk.
We are going for that viral, coffee shop quality texture here without needing an expensive espresso machine. This recipe is all about ease and instant gratification. Whether you are making this for a cozy movie night or just trying to get your kids to drink something that isn't neon colored soda, this method is the gold standard.
Let's get into why this specific technique turns a basic glass of milk into something truly velvety and indulgent.
Why Cold Emulsification Creates a Velvety Texture
Creating a high end drink in under 3 minutes requires a little bit of kitchen logic. We aren't just stirring; we are performing a quick cold fusion of flavors.
- Aroma Extraction: The alcohol in vanilla extract is a solvent that carries flavor, but it needs to be "tamed" by the sugar in the maple syrup to keep it from tasting medicinal.
- Sodium Enhancement: That tiny pinch of sea salt isn't there to make it salty; it suppresses the bitterness of the alcohol and makes the floral notes of the vanilla pop.
- Aeration Physics: Shaking the jar for exactly 20 seconds introduces tiny air bubbles (micro foam) into the milk fats, which gives you that thick, luxurious mouthfeel.
- Syrup Solubility: Creating a "concentrate" first ensures the sweetener doesn't just sink to the bottom of the glass in a sticky clump.
| Method | Time | Texture | Best For |
|---|---|---|---|
| Mason Jar Shake | 3 minutes | Frothy and light | Daily quick cravings |
| Handheld Frother | 2 minutes | Thick micro foam | Aesthetic viral drinks |
| Whisking by Hand | 5 minutes | Smooth but flat | Low equipment needs |
Using the right method depends on how much foam you actually want. If you are after those gorgeous layers you see on social media, the frother is your best friend. But for a nostalgic, childhood style treat, the mason jar shake creates a much more integrated and velvety drink that stays consistent from the first sip to the last.
Crucial Numbers for the Best Vanilla Milk
To get this right every single time, you have to respect the ratios. If you add too much milk, the vanilla gets lost; too little, and it's cloyingly sweet. I have tested this dozens of times to find the sweet spot that mimics a high end vanilla bean latte but without the caffeine.
Component Deep Dive
| Ingredient | Science Role | Pro Secret |
|---|---|---|
| Whole Milk | Fat Carrier | Use the coldest milk possible for better foam stability. |
| Maple Syrup | Viscosity | Grade A Amber adds floral notes that mimic expensive vanilla beans. |
| Sea Salt | Flavor Bridge | Fine grain dissolves faster, preventing a "crunchy" surprise. |
The fat content in whole milk is actually what carries the scent of the vanilla to your nose. If you try to use skim milk, you lose that "coating" effect on the tongue, and the drink feels thin. When I am feeling extra indulgent, I sometimes use a chocolate milk recipe as a base and add the vanilla to that for a "white chocolate" hybrid vibe that is absolutely massive for any sweet tooth.
Selecting the Best Components for Floral Sweetness
1 tsp vanilla extract Don't reach for the imitation stuff here. Since there are so few ingredients, the quality of the extract is everything. Look for "Pure Vanilla Extract" (like Nielsen Massey) which has those woody, complex undertones.
Why this? Pure extract provides the essential aromatic oils that imitation versions simply lack.
1.5 tbsp maple syrup I prefer maple over white sugar because it’s a liquid sweetener. It blends instantly and adds a hint of caramel that makes the milk taste "cooked" even though it's cold.
Why this? Liquid sweeteners prevent graininess and add a complex, earthy sweetness profile.
1 pinch sea salt This is the most skipped step, and it’s the biggest mistake you can make. Salt is a flavor magnifier. It makes the sugar taste sweeter and the vanilla taste deeper.
Why this? Salt balances the sweetness and sharpens the aromatic profile of the vanilla.
1.25 cups whole milk Whole milk has the perfect protein to fat ratio to hold onto those tiny air bubbles we’re going to create. If you use plant based milk, go for a "Barista Edition" oat milk.
Why this? Higher fat content ensures a velvety mouthfeel and better aroma retention.
Simple Tools for a Frothy Milk Finish
You don't need a pantry full of gadgets to make this, which is why I love it so much. A simple 16 oz mason jar is actually the superior tool here. The height of the jar allows the milk to crash against the lid and the bottom during the shake, which builds a much better foam than a standard cocktail shaker.
If you are someone who lives for the "viral" aesthetic, a small handheld milk frother is a great investment. It creates a much tighter, more stable foam that sits on top of the milk like a cloud. I also recommend using a heavy glass that you’ve tossed in the freezer for 5 minutes.
There is something about the "shatter" of cold condensation on the glass that makes the whole experience feel more premium.
Steps to Creating This Fragrant Dairy Treat

- Place the 1 tsp vanilla extract into your 16 oz mason jar or a sturdy glass. Note: Using the jar first allows for better mixing.
- Add 1.5 tbsp maple syrup and the 1 pinch sea salt directly into the vanilla.
- Stir the mixture vigorously for 10 seconds until the salt is completely dissolved and the liquid looks like clear gold.
- Pour in the 1.25 cups of cold whole milk. Note: The colder the milk, the better it foams.
- Secure the lid on your jar tightly.
- Shake the jar vigorously for 20 seconds until you hear the liquid sound "thicker" and see bubbles forming.
- If using a frother instead, submerge it just below the surface for 15 seconds until a light, velvety foam forms on top.
- Pour the mixture into a chilled glass immediately.
- Garnish with an optional dusting of cinnamon to enhance the woody aroma.
- Serve immediately while the foam is at its peak height.
Common Texture Issues and Simple Fixes
Why is my vanilla milk tasting thin?
This usually happens if the milk isn't cold enough or if you used a low-fat dairy option. Fat provides the "body" of the drink. If you are using 2% or skim, the vanilla flavor will feel sharp and "thin" on the palate.
Another culprit is not shaking long enough; that 20 second mark is where the magic happens for the texture.
Why does the sweetener stay at the bottom?
This is a classic "order of operations" error. If you pour the milk in first and then add the syrup, the cold milk causes the syrup to seize up and sink. By mixing the syrup and extract first (Step 3), you create a base that is ready to bond with the milk.
| Problem | Root Cause | Solution |
|---|---|---|
| Grainy texture | Salt didn't dissolve | Stir the base for 10 full seconds before adding milk. |
| Boozy aftertaste | Poor emulsification | Increase shake time to 30 seconds to better distribute extract. |
| Flat/No foam | Milk was too warm | Chill the milk to 40°F (4°C) before starting the recipe. |
Common Mistakes Checklist
- ✓ Never use imitation vanilla; the alcohol scent will overpower the dairy.
- ✓ Don't skip the salt; it’s the secret to making the maple syrup taste "rich."
- ✓ Use a jar with plenty of "headspace" (extra room) so the milk can aerate.
- ✓ Avoid stirring with a spoon if you want foam; shaking is non negotiable for texture.
- ✓ Drink it immediately; the micro foam begins to collapse after 5 minutes.
Adjusting This Treat for Various Dietary Needs
If you are looking for a healthy vanilla milk recipe, you can easily swap the maple syrup for a few drops of liquid stevia or monk fruit sweetener. Just keep in mind that you'll lose that caramel colored "gold syrup" stage, so you'll need to shake even more vigorously to ensure the flavors are integrated.
For a dairy-free version, oat milk is the only way to go. It has a natural sweetness that plays beautifully with vanilla, and the "Barista" versions contain added fats that mimic whole milk's frothing ability.
You can also turn this into a quick vanilla milk syrup recipe for your morning coffee. Simply double the vanilla and maple syrup amounts, keep the salt, and only add a splash of milk. This creates a concentrated creamer that transforms a boring cup of black coffee into something worthy of a $7 price tag.
I’ve even tried adding a dash of cinnamon to the base mixture, which makes it taste like a liquid snickerdoodle.
Preservation Strategies for Your Homemade Vanilla Milk
Storage: You can keep this in the fridge for up to 3 days in a sealed mason jar. However, the foam will disappear completely. When you are ready to drink it again, just give the jar a fresh 20 second shake to revive that velvety texture.
Freezing: Believe it or not, you can freeze this in ice cube trays! These "vanilla cubes" are brilliant for adding to iced coffee. As they melt, they season your coffee with vanilla and cream without watering it down. They stay good in the freezer for about 2 months.
Zero Waste Tip: If you have just a tiny bit of vanilla milk left, don't pour it down the drain. Use it as the liquid base for a small batch of cookie dough for one. The vanilla and maple notes in the milk add an extra layer of flavor to the dough that plain milk just can't touch. You can also use the leftover milk to soak your morning oats it's like having dessert for breakfast.
Creative Ways to Enjoy This Sweet Infusion
While a glass of this is perfect on its own, I love pairing it with something warm and crunchy. It’s the ultimate "dip" for a hot chocolate chip cookie. The cold, floral milk cutting through a warm, gooey cookie is the kind of stuff that dreams are made of. If you’re in a breakfast mood, try serving this alongside a bowl of warm cinnamon milk with cereal. The double hit of vanilla and cinnamon is an absolute aromatic powerhouse.
Myths About Homemade Flavored Milk
Myth 1: Heating the milk makes the vanilla stronger. Actually, heating the milk can cause the alcohol in the vanilla extract to evaporate too quickly, taking some of the delicate floral aromas with it.
Cold infusion (shaking) keeps those volatile compounds trapped in the fat of the milk, leading to a "brighter" flavor profile.
Myth 2: You need a blender for "real" foam. Blenders actually create "macro bubbles" which are large and pop quickly. The "micro foam" created by shaking or a frother is much denser and lasts longer on the tongue.
Plus, cleaning a blender for one glass of milk is a massive chore that no one has time for.
Myth 3: Vanilla milk is just for kids. Not when it’s made this way. The addition of sea salt and maple syrup gives this drink a "grown up" complexity. It’s essentially a non alcoholic cocktail.
The salt provides a sophisticated finish that moves it away from "sugary cereal milk" and into the territory of a refined dessert beverage.

Recipe FAQs
Is it safe to put vanilla extract in milk?
Yes, it is perfectly safe. Using high-quality vanilla extract adds a complex aroma that elevates plain dairy without any health risks.
What does vanilla do to milk?
It enhances the perceived sweetness and adds aromatic depth. When combined with maple syrup and a pinch of salt, the vanilla acts as a flavor bridge that makes the milk taste richer.
Does vanilla help nausea?
No, this is a common misconception. While the scent of vanilla is pleasant, it is not a medically proven treatment for nausea.
How to infuse vanilla in milk?
Combine the vanilla extract, maple syrup, and sea salt in a jar first, then stir for 10 seconds. Once the salt dissolves, add your cold milk and shake vigorously for 20 seconds to aerate and incorporate the flavors.
Can I use imitation vanilla instead of real extract?
No, avoid imitation vanilla entirely. The synthetic alcohol notes in imitation versions will overpower the delicate flavor of the dairy.
Why is my drink not getting foamy?
Ensure you are using a jar with plenty of empty headspace for aeration. If you mastered the emulsification technique used here, you know that physical agitation is the only way to create stable micro foam.
How long can I store this before serving?
Serve it immediately. The micro foam begins to collapse after 5 minutes, so it is best enjoyed right after shaking.
Homemade Vanilla Milk

Ingredients:
Instructions:
Nutrition Facts:
| Calories | 280 kcal |
|---|---|
| Protein | 9.8 g |
| Fat | 10.1 g |
| Carbs | 35.8 g |
| Fiber | 0 g |
| Sugar | 32.4 g |
| Sodium | 215 mg |
