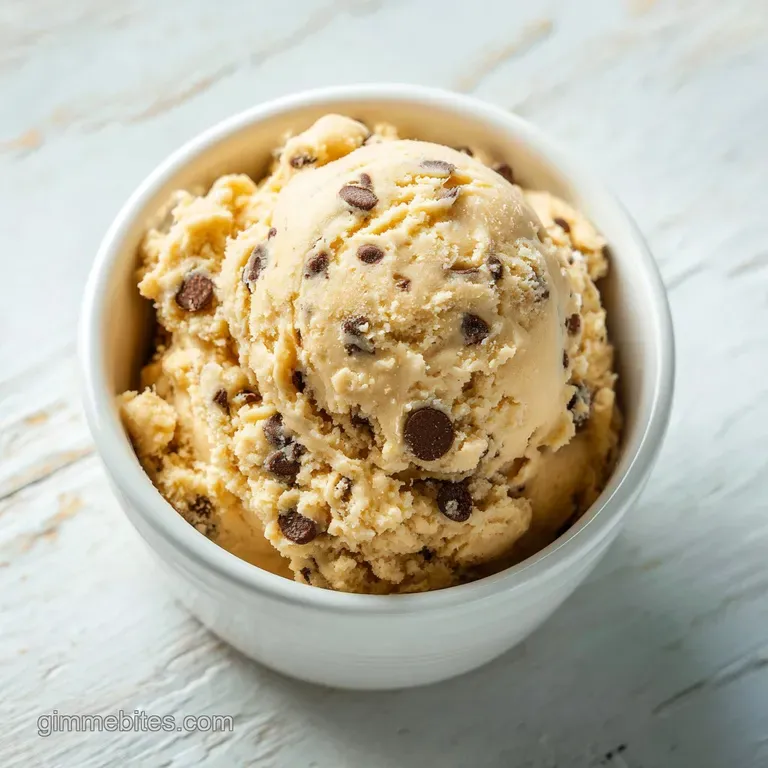
Non Cook Cookie Dough: Velvety and Smooth
- Time: Active 15 minutes, Passive 5 minutes, Total 20 minutes
- Flavor/Texture Hook: Velvety, buttery, and melt on-the tongue smooth
- Perfect for: Movie nights, viral snack cravings, or quick dessert fixes
- Mastering the Best Non Cook Cookie Dough
- Why This Recipe Works
- Essential Specs and Timing
- Ingredient Analysis and Deep Dive
- Must Have Kitchen Equipment
- Mixing Steps for Perfect Texture
- Avoid These Common Baking Blunders
- Tasty Variations and Flavor Swaps
- Keeping Your Dough Fresh
- Best Ways to Serve This
- Debunking Common Dough Myths
- Recipe FAQs
- 📝 Recipe Card
Mastering the Best Non Cook Cookie Dough
It's 11 PM, the movie is halfway through, and that nagging craving for something sugary hits like a freight train. You know the feeling. You go to the fridge, but you don't want a cold piece of fruit or a stale granola bar. You want the good stuff.
You want that specific, buttery, gritty but-smooth texture of raw cookie dough, but you also don't want to risk the stomach ache that comes with raw eggs or untreated flour. That's exactly where this non cook cookie dough saves the night.
I've stood in my kitchen more times than I can count, whisk in hand, trying to find that perfect balance of sugar crunch and buttery silkiness.
The real hero of this recipe isn't actually the chocolate. It is the all purpose flour. Most people think flour is just a filler, but in an edible dough, it provides the essential "body" and that classic nostalgic flavor we all grew up stealing from the mixing bowl.
If you try to use substitutes like almond flour or coconut flour, you lose that specific childhood memory taste. But we can't just dump raw flour in a bowl. We have to treat it like the star it is.
By gently heating it, we transform it from a risky raw powder into a toasted, safe, and slightly nutty base that holds everything together.
Trust me, once you've tasted the way the light brown sugar dissolves into the softened butter, creating those tiny pockets of caramel like sweetness, you'll never look at a baked cookie the same way again. It is all about the layers of flavor.
We start with the fat, build the sweetness, and then anchor it all with that heat treated flour. It is fast, it is viral for a reason, and it is exactly what your sweet tooth is screaming for right now. Let's get into the details of how to make this happen without a single minute in the oven.
Why This Recipe Works
- Safety Barrier: Heat treating the flour to 160°F kills potential bacteria, making the base completely safe to eat raw.
- Aeration Magic: Beating the butter for a full three minutes creates tiny air bubbles that mimic the lift of a baked cookie.
- Moisture Control: Replacing eggs with whole milk provides the necessary liquid to hydrate the flour without making the dough slimy.
- Texture Contrast: Using two types of sugar provides a mix of quick dissolving sweetness and lingering molasses notes.
| Method | Time | Texture | Best For |
|---|---|---|---|
| Microwave | 2 minutes | Soft and neutral | Quick late night snacks |
| Oven Sheet | 7 minutes | Slightly toasted | Deep, nutty flavor profiles |
| No Heat | 0 minutes | Raw and gritty | Note: Not recommended for safety |
Choosing the right way to prep your flour changes the whole vibe of the dough. The microwave is my go to when I'm impatient, but the oven method adds a beautiful golden hue to the finished product. If you're looking for a smaller portion, check out my cookie dough for one which uses similar techniques on a micro scale.
Essential Specs and Timing
This recipe is designed to be fast, but you can't rush the cooling process. If you add hot flour to your butter, you'll end up with a greasy, melted soup instead of a fluffy dough. It's the one mistake I see people make over and over again. You have to let that flour sit until it's cool to the touch.
It usually takes about 5 minutes if you spread it out thin on a plate.
The ratios here are dialed in for five servings. It's enough to share, but let's be honest, you might end up keeping it all for yourself. The total time of 20 minutes includes the prep and the quick cook time for the flour. Don't skip the sifting step either.
Heat treated flour tends to clump up like crazy, and nobody wants a bite of dry, compressed flour in their treat.
| Component | Measurement | Science Role | Pro Secret |
|---|---|---|---|
| All Purpose Flour | 1.25 cups | Provides structural bulk | Sift after heating for silkiness |
| Unsalted Butter | 0.5 cup | Carries flavor and fat | Must be soft, not melted |
| Light Brown Sugar | 0.5 cup | Adds moisture and chew | Pack it tight for accuracy |
| Mini Choco Chips | 0.5 cup | Distributes sweetness | Use mini for better coverage |
The interaction between the fats and the sugars is what creates that velvety mouthfeel. If you use cold butter, the sugars won't integrate, and you'll have a chunky mess. If it's too melted, the dough won't hold its shape. You want it just soft enough that your finger leaves an indent with zero resistance.
Ingredient Analysis and Deep Dive
Let's talk about why we use light brown sugar alongside granulated sugar. The light brown sugar contains molasses, which is acidic and moist. This adds a depth of flavor that mimics a traditional baked cookie. The granulated sugar, on the other hand, provides that classic "crunch" that makes cookie dough so addictive.
If you only used one or the other, the flavor would be flat.
- 1.25 cups all purpose flour (150g) Why this? Essential for the traditional "cookie" taste and texture profile.
- 0.5 cup unsalted butter, softened (113g) Why this? Provides the fat base that carries the vanilla and sugar flavors.
- 0.5 cup light brown sugar, packed (100g) Why this? Adds moisture and a hint of caramel through molasses content.
- 0.25 cup granulated sugar (50g) Why this? Creates the iconic slightly gritty texture of raw dough.
- 2 tablespoons whole milk (30g) Why this? Binds the dough together in place of raw eggs.
- 1 teaspoon pure vanilla extract (4g) Why this? Rounds out the sweetness with floral, aromatic notes.
- 0.5 teaspoon fine sea salt (3g) Why this? Cuts through the heavy sugar to balance the overall palate.
- 0.5 cup semi sweet mini chocolate chips (90g) Why this? Ensures chocolate in every single bite due to smaller size.
| Original Ingredient | Substitute | Why It Works |
|---|---|---|
| Unsalted Butter | Salted Butter | Works fine; just omit the extra sea salt. |
| Whole Milk | Oat Milk | Great dairy-free swap with a similar creamy thickness. |
| Mini Chips | Chopped Bars | Note: Gives a more "rustic" and irregular chocolate distribution. |
For those who love that sweet fruity combo, you might also like this cherry chip cake which uses a similar vanilla heavy base to highlight the mix ins.
Must Have Kitchen Equipment
You don't need a high tech lab to make this, but a few specific tools make it much easier. A microwave safe bowl is a non negotiable for the heat treating step. If you use a metal bowl in the microwave, well, we've all seen the videos of what happens there. Just don't do it.
A glass bowl is best because it retains heat well enough to kill the bacteria but cools down relatively quickly.
A hand mixer is your best friend here. While you can do this by hand with a stiff spatula, you'll never get the butter and sugar as pale and aerated as a mixer can. The more air you whip in, the lighter the dough feels on the tongue. If you're doing this by hand, prepare for a serious arm workout.
You'll also need a fine mesh strainer. Heat treated flour is notoriously clumpy, and sifting is the only way to ensure your dough isn't full of dry pockets.
Finally,, a digital thermometer is great if you want to be 100% sure about safety. You're looking for that 160°F mark. If you don't have one, the 2 minute microwave rule is a very reliable backup. Just make sure you're stirring every 30 seconds so the flour doesn't scorch on the bottom.
Mixing Steps for Perfect Texture
1. Safety First Heat Treatment
Place 1.25 cups all purpose flour in a microwave safe bowl. Heat in 30 second intervals for approximately 2 minutes. Note: This kills any lingering bacteria and makes the flour safe to consume raw.
2. Sifting for Perfect Smoothness
Let the flour cool completely. Use a fine mesh strainer to sift it into a separate bowl, discarding any hard, burnt, or clumped bits.
3. The Creaming Phase Secrets
In a large mixing bowl, combine 0.5 cup softened butter, 0.5 cup light brown sugar, and 0.25 cup granulated sugar. Beat with a hand mixer for 2-3 minutes until the mixture is pale and light.
4. Emulsifying for Smooth Results
Add 1 teaspoon vanilla extract, 0.5 teaspoon sea salt, and 2 tablespoons whole milk to the butter mixture. Continue mixing until the liquid is fully incorporated.
5. Folding the Flour Carefully
Add the cooled flour to the wet ingredients. Mix on the lowest speed until you see no more white streaks. Note: Over mixing here can make the texture gummy rather than fluffy.
6. Adding the Final Mixins
Gently fold in 0.5 cup mini chocolate chips using a spatula. Ensure they are evenly spread throughout the dough until it looks perfectly speckled.
7. Optional Chilling Phase
For a more "scoopable" texture, place the bowl in the fridge for 10 minutes. This allows the butter to firm up slightly until it holds its shape on a spoon.
8. Serving the Dough
Divide into five portions or serve in one large bowl. The dough is ready to eat immediately while it is still soft and buttery.
Avoid These Common Baking Blunders
Why Your Dough Is Gummy
The most common reason for a gummy, sticky texture is mixing the flour too much or adding it while it's still warm. When flour meets moisture and heat, it starts to develop gluten and starch gelatinization. In a non baked recipe, we want to minimize this. Keep your mixing to a minimum once the flour hits the bowl.
Fixing a Grainy Texture
If the dough feels too crunchy, it's likely the granulated sugar hasn't had a chance to marry with the butter. This usually happens if the butter was too cold. You can let the dough sit at room temperature for 15 minutes to let the sugars soften naturally, then give it one quick stir.
| Problem | Root Cause | Solution |
|---|---|---|
| Greasy Pooled Butter | Flour was too hot | Chill dough for 30 mins and re whip. |
| Dry and Crumbly | Not enough milk | Add milk 1 teaspoon at a time. |
| Burnt Flour Smell | Over heated in microwave | Discard and restart; use shorter intervals. |
Common Mistakes Checklist
- ✓ Never use flour straight from the bag without heating it first.
- ✓ Make sure your butter is truly "room temperature" (about 65-70°F).
- ✓ Sift the flour after heating to remove the "flour rocks" that form.
- ✓ Don't use regular chocolate chips if you can find mini ones; the distribution is better.
- ✓ Use a thermometer to hit 160°F for guaranteed safety.
Tasty Variations and Flavor Swaps
Salted Caramel Twist Variation
Swap the semi sweet chips for sea salt caramel chips and add an extra pinch of flakey salt on top. This version feels much more "adult" and sophisticated. The extra salt helps cut through the sweetness of the caramel, making it impossible to stop eating.
Peanut Butter Protein Swap
Replace 2 tablespoons of the butter with creamy peanut butter. This adds a massive punch of protein and fat that makes the dough even richer. It changes the color to a beautiful tan and pairs perfectly with dark chocolate chips instead of semi sweet.
Fun Birthday Cake Style
Omit the chocolate chips and use 0.5 cup of rainbow sprinkles instead. Add a 0.25 teaspoon of almond extract along with the vanilla. It tastes exactly like a viral "dunkable" frosting from the 90s. This is always a hit at parties because of the bright colors and nostalgic flavor.
| Servings | Butter Adjustment | Flour Adjustment | Prep Time |
|---|---|---|---|
| 2 People | 3 tablespoons | 0.5 cup | 10 minutes |
| 5 People (Original) | 0.5 cup | 1.25 cups | 15 minutes |
| 10 People | 1 cup | 2.5 cups | 20 minutes |
Keeping Your Dough Fresh
This dough keeps surprisingly well because there are no eggs to worry about. I like to roll it into a log using plastic wrap, which makes it easy to slice off a "cookie" whenever the craving hits. It stays soft in the fridge for up to a week.
If you leave it in there longer, the flour starts to absorb more moisture and it can get a bit dense.
For long term storage, you can actually freeze this! Scoop individual balls onto a baking sheet, freeze until solid, then toss them into a freezer bag. They'll last for 2 months. You don't even need to thaw them; eating a frozen cookie dough ball is like having a bite sized piece of cookie dough ice cream.
To use up leftovers in a zero waste way, crumble the cold dough over a bowl of warm oatmeal or fold it into softened vanilla ice cream. You can also press it into a small pie crust to make a "no bake" cookie dough tart.
Just don't try to bake this into actual cookies it lacks the leavening agents like baking soda or eggs, so they'll just melt into a flat, sugary puddle on your pan.
Best Ways to Serve This
To Elevate Your Movie Night
Instead of just a bowl, serve this with pretzels or apple slices. The salty crunch of a pretzel dipped into this sweet dough is a top tier snack experience. It breaks up the richness and adds a necessary texture change.
Restaurant Style Sundae Toppings
Warm up some fudge sauce and pour it over a scoop of this dough, then top with whipped cream. Because the dough is safe to eat and soft, it acts as a decadent base for an over the-top sundae. It's much more substantial than just ice cream alone.
Movie Night Snack Ideas
If you're feeling fancy, use a small cookie scoop to make perfectly round truffles. Roll them in cocoa powder or crushed nuts. It turns a simple bowl of dough into a plate of "cookie dough truffles" that look like they came from a high end bakery.
Debunking Common Dough Myths
One huge misconception is that "raw eggs are the only danger" in cookie dough. That is simply not true. Raw flour is actually a raw agricultural product that hasn't been treated to kill germs. That's why the heat treating step is the most important part of this entire process.
Another myth is that you can't get "fluffy" dough without eggs. While eggs do provide structure, the creaming of the butter and sugar provides all the lift we need for an edible version. If you whip it long enough, you'll see the color change from yellow to almost white that's the air doing its job.
Finally, people often think you can't use this dough for anything else. On the contrary, it is the most versatile dessert component in my kitchen. Use it as a layer in a cake, a filling for cupcakes, or a base for a cheesecake.
As long as you aren't trying to bake it, the sky is the limit for how you use this buttery, sugary goodness.

Recipe FAQs
Can I have cookie dough while breastfeeding?
Yes, provided you heat treat the flour first. Raw flour can harbor bacteria, so heating it to 160°F is essential to make this treat safe to enjoy.
Is cookie dough just undercooked cookie?
No, this is a common misconception. Standard cookie dough contains raw eggs and untreated flour, whereas this specific recipe is formulated without eggs and uses heat treated flour for safety.
Does cookie dough have to be cooked?
No, you do not bake it. Simply heat treat the flour to 160°F in the microwave or oven, then combine it with your butter, sugars, and other ingredients as directed.
Can I eat cookie dough not cooked?
Yes, but only if you follow the safety steps. You must heat the flour to 160°F and ensure you are not using raw eggs, which are omitted from this safe-to-eat recipe.
How to heat treat flour for this recipe?
Heat the flour in a microwave safe bowl using 30-second intervals. Stir between each burst until a thermometer confirms the flour reaches 160°F, then sift it through a fine mesh strainer to remove any clumps before mixing.
How to ensure the perfect texture?
Beat your butter and sugars for a full 2-3 minutes until pale and aerated. If you enjoyed mastering this creaming technique, see how we apply the same aeration method in our chocolate cloud recipe to achieve a light, luxurious mouthfeel.
Why is my dough texture gummy?
Avoid overmixing once the flour is added. Mix on low speed only until the flour is just combined, as excessive agitation can develop the starch and lead to a gummy texture.
Non Cook Cookie Dough
Ingredients:
Instructions:
Nutrition Facts:
| Calories | 478 kcal |
|---|---|
| Protein | 4.1g |
| Fat | 23.8g |
| Carbs | 64g |
| Fiber | 1.9g |
| Sugar | 40.8g |
| Sodium | 232mg |
