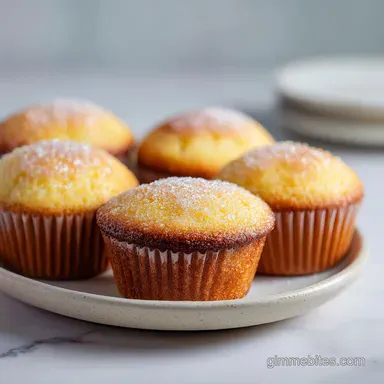
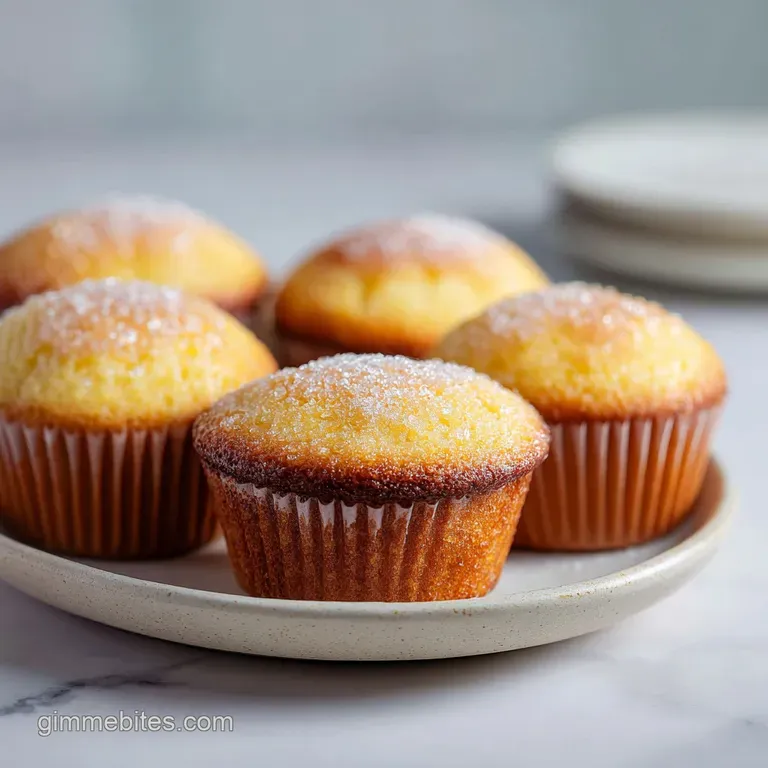
Mini Muffins: Bakery Style Domes
- Time: Active 10 minutes, Passive 10 minutes, Total 20 minutes
- Flavor/Texture Hook: A velvety, dense crumb paired with a golden, slightly crisp crown that yields to a buttery center.
- Perfect for: School lunchboxes, quick morning hits, or impressive party platters for a crowd.
- Create Golden Domes with These Mini Muffins
- The Secret to the Dome
- Breaking Down the Essential Components
- Essential Ingredients and Substitutes
- Timing and Temperature for Success
- Solving Common Baking Hurdles
- Scaling for a Crowd
- Flour and Moisture Myths
- Storage and Zero Waste Tips
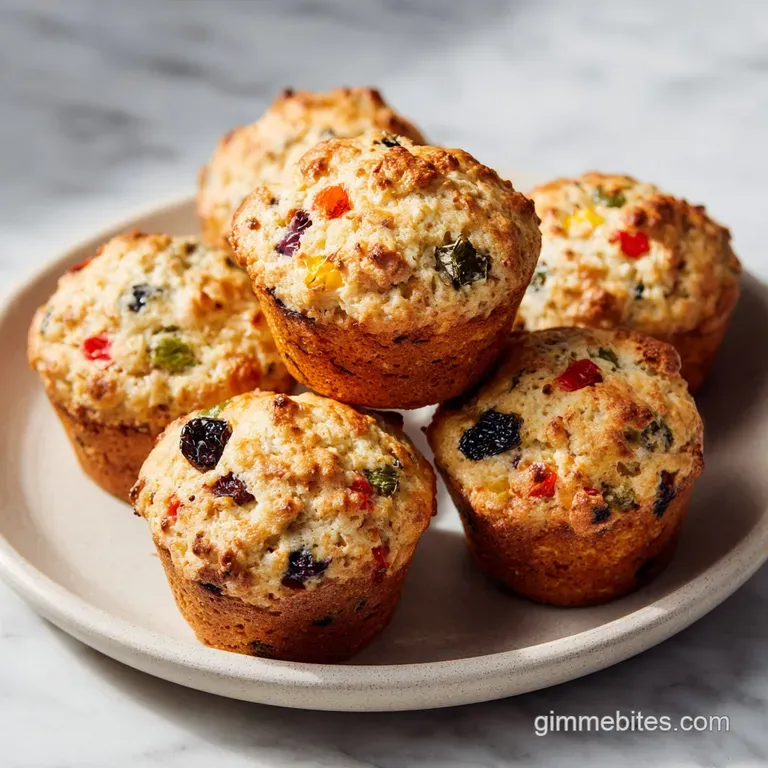
- Flavor Variations to Try
- What to Serve This With
- Recipe FAQs
- 📝 Recipe Card
Create Golden Domes with These Mini Muffins
Have you ever wondered why some muffins look like sad, flat pancakes while others have that majestic, rounded top that looks like it belongs in a professional pastry case? It’s a question that kept me up until I realized that heat is actually a physical lever you can pull to force the batter upward before it sets.
I remember standing in front of my oven glass, literally counting down the seconds, watching as the batter for these little bite muffins transformed from a pale puddle into a glorious, bronzed peak.
The smell of vanilla bean paste hitting that high heat is something I genuinely wish I could bottle up and wear as a perfume; it fills the kitchen with this warm, sugary embrace that makes the 10 minute wait feel like an eternity.
I used to be so impatient that I’d just throw everything in a bowl and hope for the best, but I’ve learned the hard way that the order of operations is your best friend.
There’s something incredibly satisfying about the way the melted butter swirls into the thick Greek yogurt, creating a base that’s so creamy it looks like soft serve ice cream.
My massive sweet tooth usually demands I add a few extra chocolate chips, but even plain, this batter has a richness that feels way more sophisticated than your average snack. We’re going for a texture that isn’t just "fluffy" we want it to have enough substance to feel like a real treat, not just flavored air.
Trust me, once you see that first batch come out with their perfectly uniform domes and that irresistible buttery aroma, you’ll never go back to the standard one temperature baking method.
It’s all about that initial shock to the leavening agents, and I’m going to show you exactly how to time it so you get that bakery standard result every single time. It's brilliant, fast, and honestly, a bit of a game in the kitchen to see how high you can get them to climb.
Let's crack on and get these in the oven because I’m already craving that first warm, chocolate heavy bite.
The Secret to the Dome
Thermal Jump: Starting the oven at 400°F (200°C) creates a sudden burst of steam from the milk and yogurt, which rapidly expands the air bubbles before the flour structure hardens.
Acid Activation: The lactic acid in the full fat Greek yogurt reacts instantly with the baking powder, producing a massive amount of carbon dioxide for a superior lift.
Fat Saturation: Using melted butter instead of oil coats the flour proteins more thoroughly, resulting in a velvety crumb that holds its shape without becoming crumbly or dry.
Hydration Balance: The specific ratio of 190g flour to the liquid components ensures the batter is thick enough to support its own weight as it rises, preventing the dreaded middle collapse.
| Cook Method | Time | Texture | Best For |
|---|---|---|---|
| Two Stage Bake | 10 minutes | High dome, crisp top | Classic bakery look |
| Single Temp (350°F) | 12 minutes | Flatter top, uniform soft | Soft snack bites |
| Air Fryer (320°F) | 8 minutes | Extra crispy edges | Small batch cravings |
While the two stage bake is my personal favorite for that viral aesthetic, the air fryer method is a total lifesaver when you only want to bake off six of these at a time. The high speed air circulation creates a crust that is almost like a donut hole, which is a massive win if you love a bit of crunch.
Breaking Down the Essential Components
| Ingredient | Science Role | Pro Secret |
|---|---|---|
| Greek Yogurt | Provides acidity and structural moisture | Use room temp yogurt to keep the melted butter from seizing up. |
| Vanilla Bean Paste | Flavor depth and aromatic intensity | The tiny black specks make these look incredibly high end. |
| Baking Powder | Primary chemical leavener | Always whisk into dry ingredients first to avoid bitter "hot spots." |
| Unsalted Butter | Tenderness and rich mouthfeel | Melt it first so it integrates seamlessly without overworking the gluten. |
If you find yourself missing the yogurt, you can definitely pivot to sour cream for an even richer result. Just keep in mind that the fat content changes the "shatter" of the top slightly, making it a bit softer and more fudge like in the center.
Essential Ingredients and Substitutes
- 190g All purpose flour: The backbone of our structure. Why this? Provides enough protein for a sturdy rise without being tough.
- 100g Granulated sugar: For sweetness and browning. Why this? Sugar liquefies in heat, helping the muffins stay moist.
- 2 tsp Baking powder: Our lifting agent. Why this? Ensures the muffins don't turn into dense rocks.
- 0.5 tsp Fine sea salt: The flavor enhancer. Why this? Cuts through the sugar to make the vanilla pop.
- 115g Unsalted butter: Melted and cooled. Why this? Gives that classic, nostalgic bakery flavor oil can't match.
- 1 Large egg: Room temperature is a must. Why this? Binds the fats and liquids into a stable emulsion.
- 120g Full fat Greek yogurt: The moisture secret. Why this? Adds tang and weight to the crumb.
- 60ml Whole milk: For the perfect batter consistency. Why this? Thins the yogurt just enough to pour.
- 1 tbsp Vanilla bean paste: Or high-quality extract. Why this? The aroma is 50% of the eating experience.
- 90g Mini chocolate chips: Because we deserve it. Why this? Mini chips distribute better in small bites.
Substitution Table
| Original Ingredient | Substitute | Why It Works |
|---|---|---|
| Whole Milk | Oat Milk (Full fat) | Similar viscosity; adds a slight toasted grain flavor. |
| Greek Yogurt | Sour Cream | Same acidity level. Note: Result will be slightly more decadent and dense. |
| Granulated Sugar | Light Brown Sugar | Adds moisture and a hint of molasses. Note: Tops will be less crisp. |
If you’re looking to experiment with even more textures, you could try a Zucchini Carrot Muffin recipe which uses veggies for moisture. But for these classic minis, sticking to the dairy heavy base is what gives them that unmistakable "treat" status.
Timing and Temperature for Success
- Preheat your oven to 400°F (200°C) and grease your 24 cup mini muffin pan thoroughly. Note: High heat is the only way to get that initial jump.
- Whisk the 190g flour, 100g sugar, baking powder, and sea salt in a large bowl. until no lumps remain.
- Combine the melted butter, room temp egg, 120g Greek yogurt, milk, and vanilla in a separate jug. until the mixture is velvety and pale yellow.
- Pour the wet mixture into the dry bowl. until the flour is mostly incorporated. Note: Stop while you still see a few white streaks to avoid tough gluten.
- Fold in your 90g of mini chocolate chips using a silicone spatula. until they are evenly dotted throughout.
- Scoop the batter into the prepared pan, filling each hole about 3/4 full. until the batter is used up.
- Bake for exactly 5 minutes at the high temperature. until the tops have visibly rounded and set.
- Reduce the oven heat to 350°F (180°C) without opening the door. until the centers are springy.
- Finish baking for another 5 minutes. until a toothpick comes out clean and dry.
- Cool in the pan for 2 minutes, then move to a rack. until the chocolate chips have slightly set.
Solving Common Baking Hurdles
Why Your Mini Muffins Are Tough
If your muffins feel more like rubber balls than soft clouds, you likely went a bit too hard with the whisking. When flour meets liquid, gluten starts to develop. In bread, we love this; in muffins, it’s the enemy. You want to fold the batter just until the flour disappears.
If you see bubbles forming on the surface of the batter before it hits the oven, you've over mixed and the air is escaping!
Why Your Mini Muffins Stuck to the Pan
Even "non stick" pans can be deceptive. The sugar in the batter caramelizes against the metal, essentially acting like a delicious glue. If you aren't using paper liners, you need to be aggressive with your greasing. Use a pastry brush to get into the bottom corners of the mini cups.
Also, trying to remove them while they are piping hot is a mistake they need two minutes to "contract" slightly from the edges of the pan.
| Problem | Root Cause | Solution |
|---|---|---|
| Flat, sunken tops | Oven temp too low | Verify your oven temp with a thermometer; use the 400°F start. |
| Dry, crumbly texture | Overbaked or too much flour | Use a scale for the 190g flour; don't guess with cups. |
| Greasy bottoms | Butter was too hot | Let melted butter cool to room temp before adding to the egg. |
Common Mistakes Checklist
- ✓ Always use room temperature eggs to prevent the melted butter from clumping.
- ✓ Measure your flour by weight (190g) rather than volume to ensure accuracy.
- ✓ Preheat the oven for at least 20 minutes so the stone/walls are truly hot.
- ✓ Avoid opening the oven door during the temperature transition to keep the steam in.
- ✓ Check the expiration date on your baking powder; if it's old, the muffins won't rise.
Scaling for a Crowd
If you’re hosting a brunch and need to double this recipe (48 muffins), you can't just double everything and hope for the best. For the leavening, I usually recommend using 1.75x the baking powder rather than a full 2x to avoid a metallic aftertaste.
You’ll also want to work in batches; don't leave the second half of the batter sitting on the counter for 20 minutes while the first batch bakes, or the bubbles will go flat.
When scaling down to 12 muffins, the math is easier, but the egg is tricky. I suggest beating one egg in a small bowl and using exactly half of it by weight (about 25g). Use the same two stage baking temps, but keep a close eye on them at the 8 minute mark, as smaller volumes of batter in a larger oven can sometimes cook a minute faster.
For a completely different small batch vibe, you could even try a Cookie Dough Recipe for One if you’re just baking for yourself and don't want the temptation of two dozen muffins staring you down!
Flour and Moisture Myths
Myth: You must sifter the flour for light muffins. Actually, for mini muffins, a vigorous whisking of the dry ingredients achieves the same aeration without the extra dish to wash. The "lift" comes more from the chemical reaction of the yogurt and the heat than from sifted flour particles.
Myth: low-fat yogurt works just as well. Honestly, don't even bother with low-fat or fat free yogurt here. The fat in the full fat version is what provides the velvety mouthfeel and prevents the muffins from becoming "rubbery." We want that massive sweet tooth satisfaction, and that requires the real stuff.
Storage and Zero Waste Tips
These little bites are best on day one, but you can keep them in an airtight container at room temperature for up to 3 days. To revive that "just baked" shatter on the top, pop them in a 300°F oven for 4 minutes. For long term storage, they freeze beautifully.
Flash freeze them on a baking sheet for an hour before tossing them into a freezer bag; this prevents them from sticking together. They’ll stay fresh for up to 2 months.
If you end up with "oops" muffins that are a bit too dry or broken, don't toss them! Crumble them up and use them as a topping for yogurt bowls, or layer them with whipped cream and berries for a quick trifle. If you have leftover yogurt or fruit, you can even look into a Banana Courgette Muffins variation to use up those extra garden veggies.
Flavor Variations to Try
- The Blueberry Blast: Press 2-3 fresh blueberries into the top of each muffin before baking. They’ll burst and create little pools of jammy goodness.
- Lemon Poppy Seed: Swap the vanilla for lemon zest and 1 tbsp of poppy seeds for a bright, crunchy twist.
- Double Chocolate: Replace 30g of the flour with high-quality cocoa powder and increase the milk by 1 tablespoon.
- Cinnamon Swirl: Mix 1 tsp of cinnamon with 1 tbsp of sugar and swirl it into the tops with a toothpick before they hit the oven.
What to Serve This With
These are essentially the "popcorn" of the pastry world, so I love serving them alongside a big bowl of fresh strawberries and a sharp espresso. The bitterness of the coffee cuts through the buttery sweetness of the vanilla bean paste perfectly.
If you're doing a full brunch spread, they act as the perfect sweet sidekick to a savory omelet or a spicy shakshuka.
For the ultimate "viral" dessert board, serve these warm with a side of slightly salted whipped butter or a small dish of honey. The way the butter melts into the warm crumb is something you truly have to experience to understand. Just be warned they disappear incredibly fast, so maybe keep a backup batch of non cook cookie dough in the fridge for when the muffin plate inevitably hits empty!
Recipe FAQs
How to get that professional looking domed top on mini muffins?
Use a two-stage baking temperature method. Start the muffins in a preheated oven at a higher temperature for the first 5 minutes to trigger a rapid rise, then reduce the heat to finish baking for the remaining 5 minutes until a toothpick comes out clean.
Is it true that I should beat the batter until it is completely smooth?
No, this is a common misconception. You must gently fold the wet and dry ingredients until just combined, as a few streaks of flour remaining in the batter are acceptable and prevent the muffins from becoming tough.
How to store mini muffins so they stay fresh?
Keep them in an airtight container at room temperature for up to 3 days. If you need to revive that signature "just baked" shatter on the top, place them in a 300°F oven for 4 minutes.
Can I freeze these for later use?
Yes, they freeze beautifully for up to 2 months. Flash freeze the muffins on a baking sheet for an hour before transferring them to a freezer bag to ensure they do not stick together.
How to repurpose muffins that have become too dry?
Crumble the dry muffins to use as a dessert topping. If you enjoyed learning how to repurpose leftovers here, you can see how we apply similar creative cake utilization in our other baking projects.
Is a specific type of yogurt required for the batter?
Yes, use full fat Greek yogurt for the best moisture and structure. The acidity in the yogurt reacts with the baking powder to help the muffins rise, while the fat ensures a tender crumb.
How to prevent the muffins from sticking to the pan?
Lightly grease every cavity of the 24-cup mini muffin pan before adding the batter. Using a small cookie scoop to fill each cavity 3/4 full also helps maintain consistent portion sizes and prevents messy overflows.
Bakery Style Mini Muffins